To be a bit cliché, this shoemaker is a professional Web Developer and her child is this blog, but it was past time to launch what I have of a new design. All the content is still here, everything else is a work in progress (kind of like most of my sewing projects)!
How do you keep your blocks organized when sewing together rows?
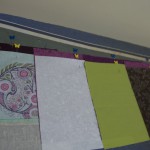
I’m working on a patchwork quilt of leftover fabric from Tula Does Up the Walls in Pah-ree—just a simple grid of 8″ squares and leftover kaleidoscope blocks. I can’t stand the idea of not chain piecing things like this… it’s so slow otherwise.
But, after going to all the work of organizing the blocks in a specific way, I don’t want them to get out of order.
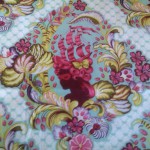
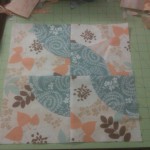
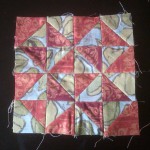
The bi-weekly So You Want To Quilt group is starting up with a new project this month: a quilt based on the Stack-n-Whack kaleidoscope technique (there are a few books about it, like Stack-n-Whackipedia). Our teacher is designing a wall hanging that we can make, but seeing as I’m more of a quilt gal myself—and lack any restraint to keep things simple lately—I’m making my own design (more on that in coming weeks).
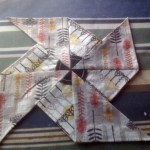
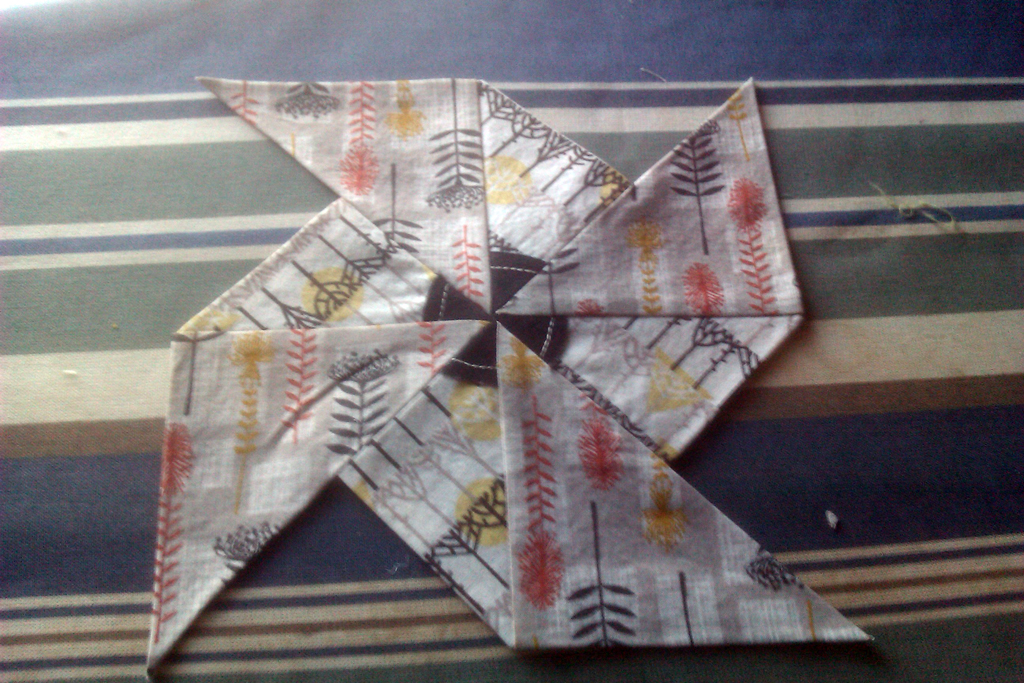
I’m evidently stuck on designing with pinwheels lately, so when I was thinking about how to make the quilt currently titled “Organic Spins”, pinwheels popped to mind yet again. As the design progressed in my head, however, I realized that I didn’t want a ton of seams in the background of the quilt. So, the idea of making a whole-cloth quilt with appliqued pinwheels came about. But, it still requires piecing part of the pinwheel together before being able to applique it on.
Last week, I played around with some scrap fabric to make a proof of concept. I finally cut into my fabric and started piecing at the Utica Modern Quilt Guild meeting/sew-together on Saturday.
Here’s the final product:
This one finishes at about 10.75″ across. It’s the middle of three different sizes I’m using (well, plus one much teenier size that will be paper pieced).
I’ve made enough progress on my WIP list from July that I feel comfortable starting a new project, finally. And, it’s one I’m keeping.
This one has been in my brain since the end of May, when we traveled to Missouri and I got the chance to stop at Sew To Speak Shoppe in Columbus, OH (I’m in love and want to move there, just for this shop). Among my purchases was a small FQ stack of Cut Out & Keep by Heather Moore for Cloud9 Fabrics.
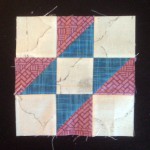
The current SYWTQ topic is sewing curved seams, so we are doing drunkard’s path.
Pulling out a small pack of FQs that my not-legally mother-in-law gave me, I decided to give it a whirl tonight, even though our current homework assignment is simply to think about the layout and fabrics to use.
From my research, there are a couple of circle-cutting rulers that can be used for drunkard’s path, not to mention a plethora of shape-specific templates. Fan that I am of Omnigrid (all my rulers are by them), I thought I’d give the OmniArc a try.
Since I am getting the hang of applique so long as I don’t need to turn any edges under, I decided to face another fear of mine—curved piecing—in the most fearful (that is, not actually confronting the fear) way possible: using applique to give the look of curved piecing.
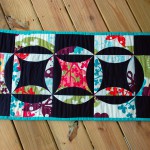
Okay, that’s a bit of an exaggeration, but the ladies at Viking Gallery were offering a weeknight class to make a “Rob Pete” table runner using the Quiltsmart method which uses fusible interfacing and applique to create curves instead of traditional piecing. So I signed up.
And before long, I had fabric that was originally intended to be the bag for the Spring Quilt Along and the Quiltsmart printed fusible interfacing turned into this bit of patchwork:
It’s a bit wrinkly from being stored rolled up for the past couple of days as I carted it around trying to finish the binding.
The printed fusible interfacing pieces look like this:
Since I was in a class, I don’t have any in-progress photos, but the premise is rather simple. You place your fabric and interfacing together (don’t fuse yet!), sew along the stitching lines, cut along the cutting lines and then turn right-side out. This puts the fusible side of the interfacing facing down so that you can fuse your curved piece to the background. Fuse, applique on, and then piece the blocks together and you’re done!
So, aside from a few typos about cutting requirements that were in the pre-publication page previews that Quiltsmart kindly sent (evidently the old book is out of print, but they’re releasing a new one soon), this was an extremely simple, straight-forward way to make Rob Peter to Pay Paul.
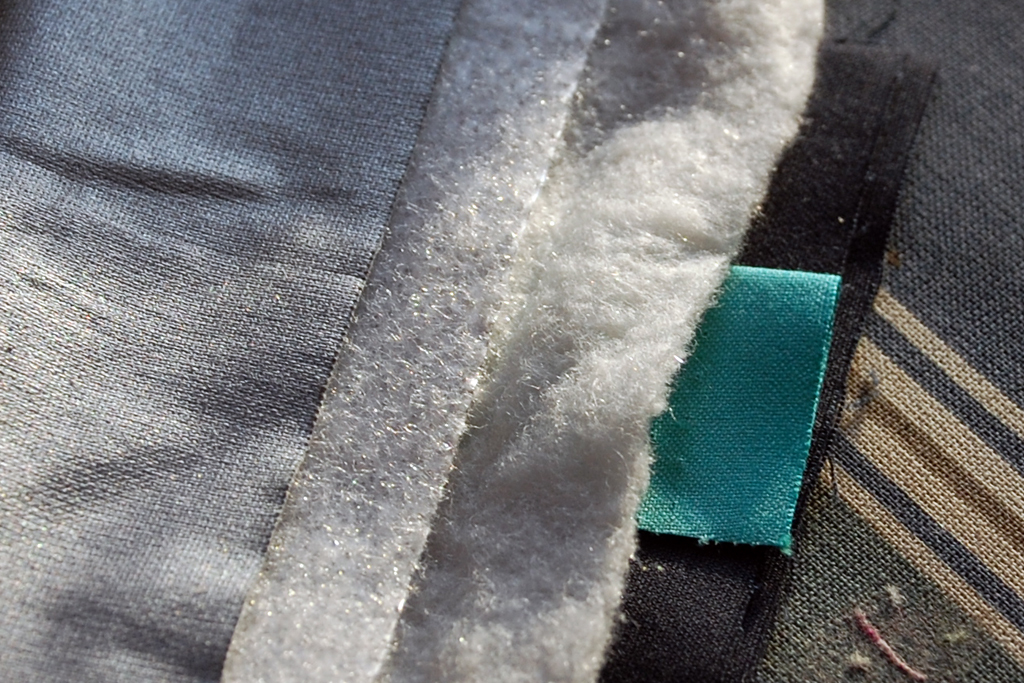
And, since I have no table on which to place a table runner (seriously… the table runner is the same dimensions as my coffee table, which is the largest table in the house aside from our desks), I decided to turn this into a very useful item: an ironing mat!
There are a few ways to make an ironing mat, but my approach required three more layers:
Ironing board fabric, which is a special aluminum-coated fabric. I bought mine from the local JoAnn, which had it in the utility fabric section. I’ve heard some people claim you shouldn’t use special fabric like this because it redirects heat back up to your fabric and promotes scorching. I’ve never had any problems. If you associate with the former camp, you can always use plain cotton instead.
Insul-Bright, a heat/cold-reflecting batting-like fabric. This is often used for things like pot-holders or lunch bags and is also available in the utility fabric aisle or in pre-cut packages in the notions aisle.
Natural fiber batting such as Warm & Natural or Bamboo/Cotton blends (I used Bamboo Fusible Batting that I had on hand. The fusible part was a bonus, but not necessary).
Then, you sandwich them all together in this order:
Ironing fabric (backing, silver-side out)
Insul-Bright with shiny-side toward the ironing fabric
Batting
Pretty pieced fabric
Simulation from scraps. Your batting, Insul-Bright, and ironing cover pieces should be approx. 2″ larger than patchwork on all sides to accommodate quilting.
Consider using spray-basting, as the ironing board fabric holds pin holes—with spray, you don’t need to pin. This was one advantage to using the fusible batting I had—I fused the patchwork to the batting and the batting to the Insul-Bright, and only had to spray baste the ironing fabric to the Insul-Bright.
Quilt as desired. For mine, I stitched in the ditch along the straight seams—which is pushing it as far as closeness for recommended quilting for the batting, but I doubt this is going to be washed very often.
Then use! You iron on the shiny side, but can flip it over to use as a table runner when it’s not needed.
Or, slip some ribbon in the binding…
That ribbon fits beautifully with the eggplant color in the Just Wing It print, but I have no idea where I purchased it. Possibly Walmart at some point or another.
My date with the farmer came a bit early last week: I sewed these three blocks early Friday afternoon. But then on Saturday, we left home at 6:30am to travel down to NYC for the day (5-hours each way for a combined car/train trip) to visit dear friends and see Alexander McQueen: Savage Beauty at the Met. If you can make it there by this Sunday, Aug. 7, I highly recommend seeing the exhibit. It was wonderful and worth the 2-hour line, in my estimation. I’d never been to the Met, but now look forward to returning to view more of their permanent collections someday. I don’t plan on another day trip down though—it was a bit brutal. But anyway, we did that, arrived at home just a few minutes shy of midnight, and I proceeded to laze around doing nothing more than light cleaning and binge reading for the next two days. So, finally, here are my week 6 blocks.
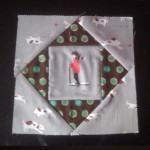
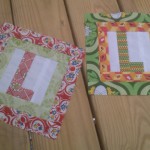
Earlier this month, Sharon from Craizee Corners put up a post soliciting blocks for a quilt for Project Linus.
So, after my date with the Farmer this afternoon (the post for which will go up Sunday, I hope), I took a stab at the two blocks I volunteered to make for her.
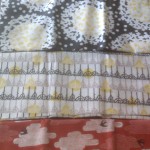
The patterned fabrics were all from a stack given to me by a friend, so I’m not sure what each one is. From what I could tell from the selvedges, the two reds are American Jane, and the fabric in the ‘L’ of the green/orange block is Nest. The orange fabric is another Moda, but no clue on who the designer/what the line is.
I think these are my three least favorite FWQAL blocks thus far, at least of the ones I’ve completed. Well, no, Wrench from Week 3 is my least favorite, but I’m not a huge fan of any of these. Also, I hope that our porch gets finished soon (starting week three without railings…) so that I can get some good photos of all of them together soon. This phone-camera-in-the-house thing isn’t working for me.
I’m a little off schedule this week (or, last, technically speaking). We had plans Friday night, which is when I’ve been working on these, and then Saturday was a race day for Carl, so we traveled and were otherwise busy. But Sunday was a sew-together with the Utica Modern Quilt Guild, so I packed up my things and drove over. I was woefully over-packed. Going in, I had hoped to finish a few blocks for FWQAL and get work done on other projects, but only had time for 2.4 blocks.