To be a bit cliché, this shoemaker is a professional Web Developer and her child is this blog, but it was past time to launch what I have of a new design. All the content is still here, everything else is a work in progress (kind of like most of my sewing projects)!
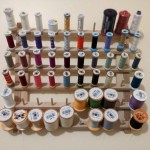
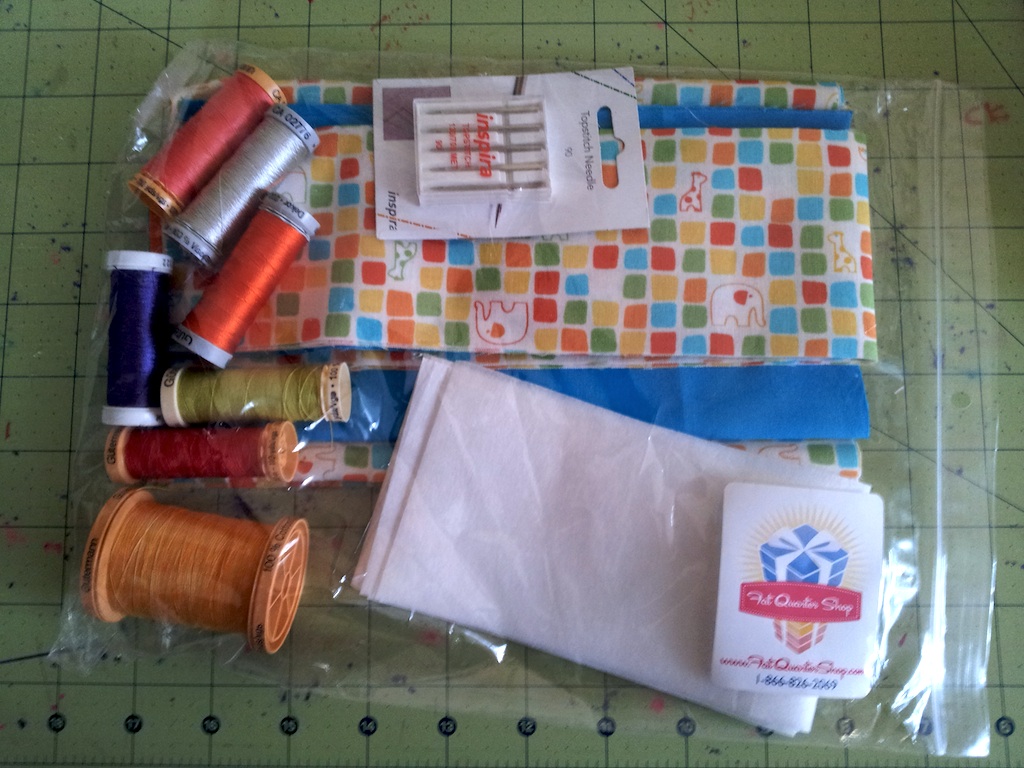
I finally gave in and purchased a thread rack to organize my spools on. Previously, I’ve kept them in a drawer (mostly), but have ended up buying the same spool more than once, or losing spools I know I’ve purchased. Looks like I underestimated my stash, though, huh?
It also has the advantage of allowing me to keep the bobbins with the spools, in cases where I’ve wound one to match (bobbin storage is its own beast that I haven’t tamed yet).
I think there are still some spools floating about the room, and in my purse, and who knows where else in the house. It’ll be full in no time. There’s not much organization—specialty threads on the top (fusible, invisible, glow-in-the-dark, metallic, wool), rayon, silk, poly sew-all, cotton, and then all my giant neutral spools.
There’s also still a few odd spools of thread I’ve inherited, bought while clearly out of my mind, or when wanting really cheap thread for one reason or another (along with some skeins of embroidery thread and bobbins from my old sewing machine) in a box. I don’t see the need to keep them out, since I don’t have much use for them (nor will I accidentally buy a second spool).
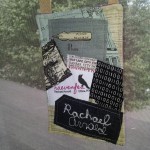
It’s not so cool as the ones I’ve seen some of you making for Sewing Summit, but my quilt club switched from plain ones to having us each make one.
So, this is what I whipped up.
I couldn’t really think of what to do, but then I started looking at my stash and it all came together in my head.
Mostly, it’s all just fused, then topstitched. I threw my quilt label in, a bit of binary (I am a computer scientist [well, theoretically], after all), “Kansas City” (my hometown), “Costume” (that’s how I got started sewing to begin with), and a pen nib (’cause I blog, and write, etc.).
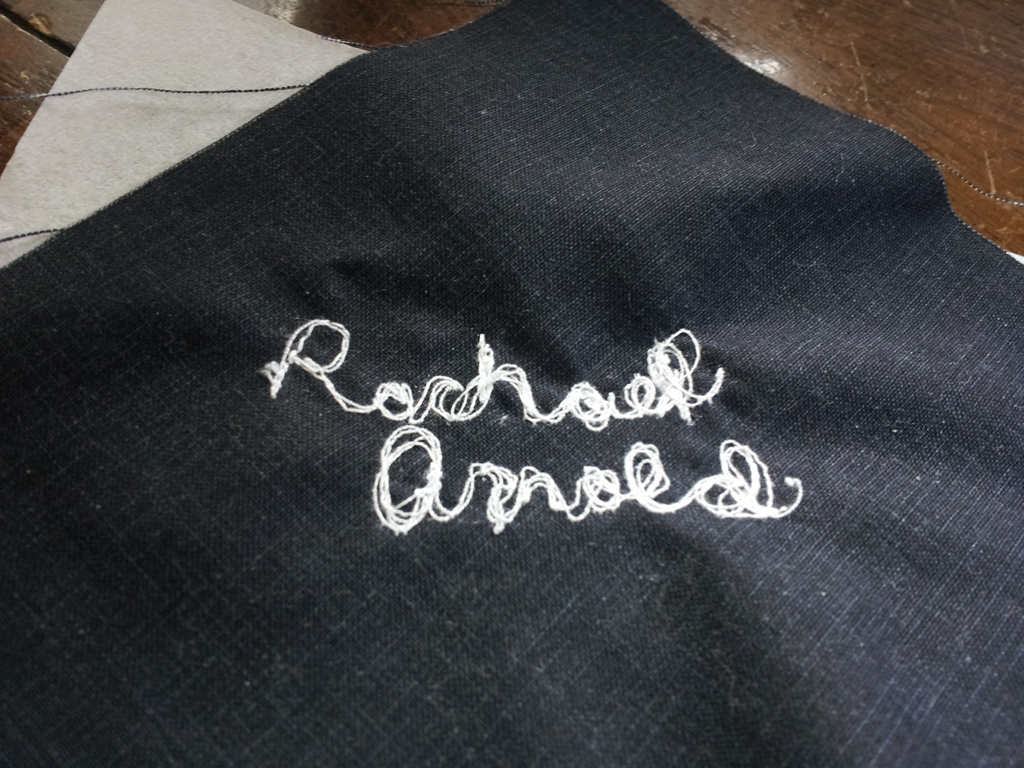
I FMQed my name. My penmanship is horrible. My first attempt was worse:
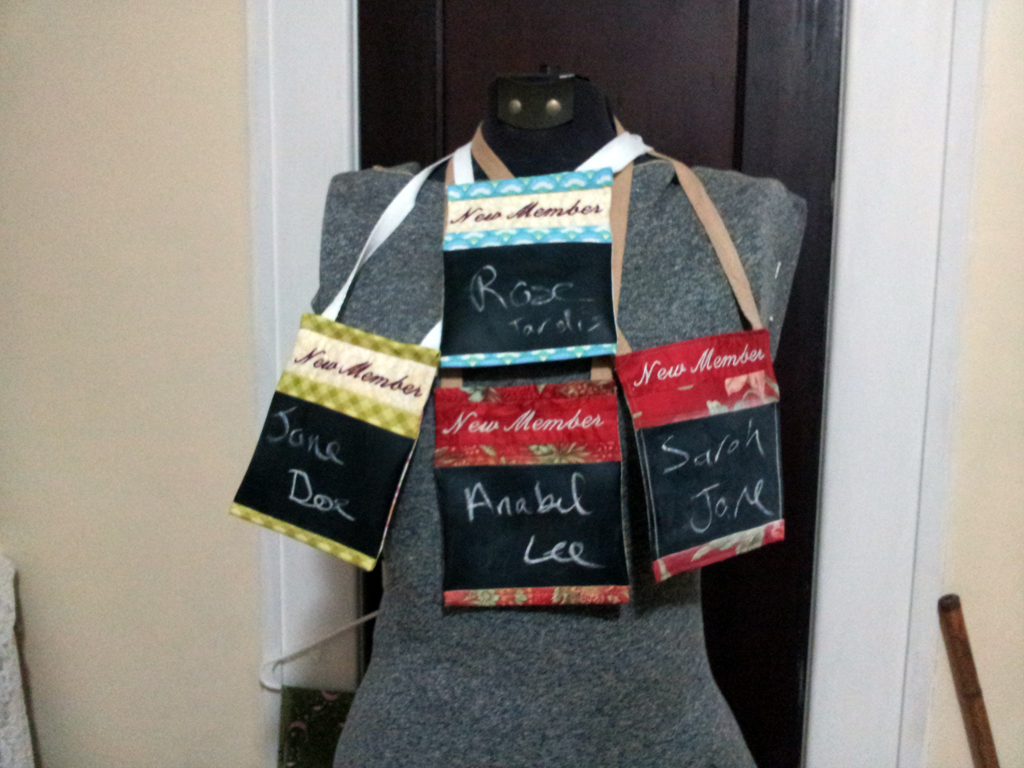
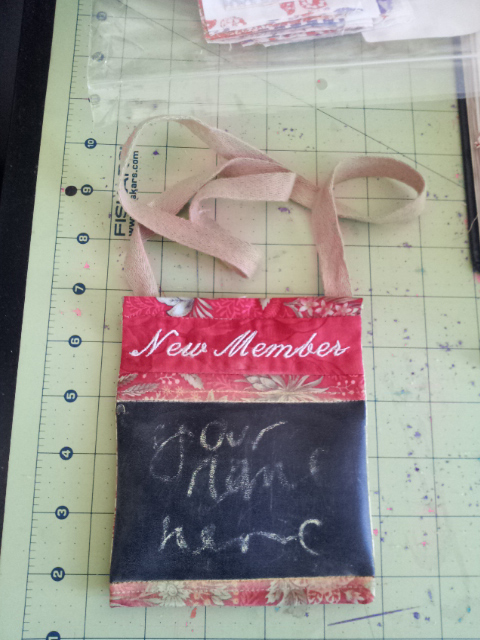
Once I was done with that, I whipped up a couple of additional new member tags. I bought new chalk, and am convinced that my chalk cloth woes were only partially due to the cloth, and largely due to the crappy Crayola chalk I had.
So, in the future, I think I’ll stick to buying Prang Hygieia Chalk (which is cheap—99¢—at my local Staples).
We’ll see how they work out over the course of the year.
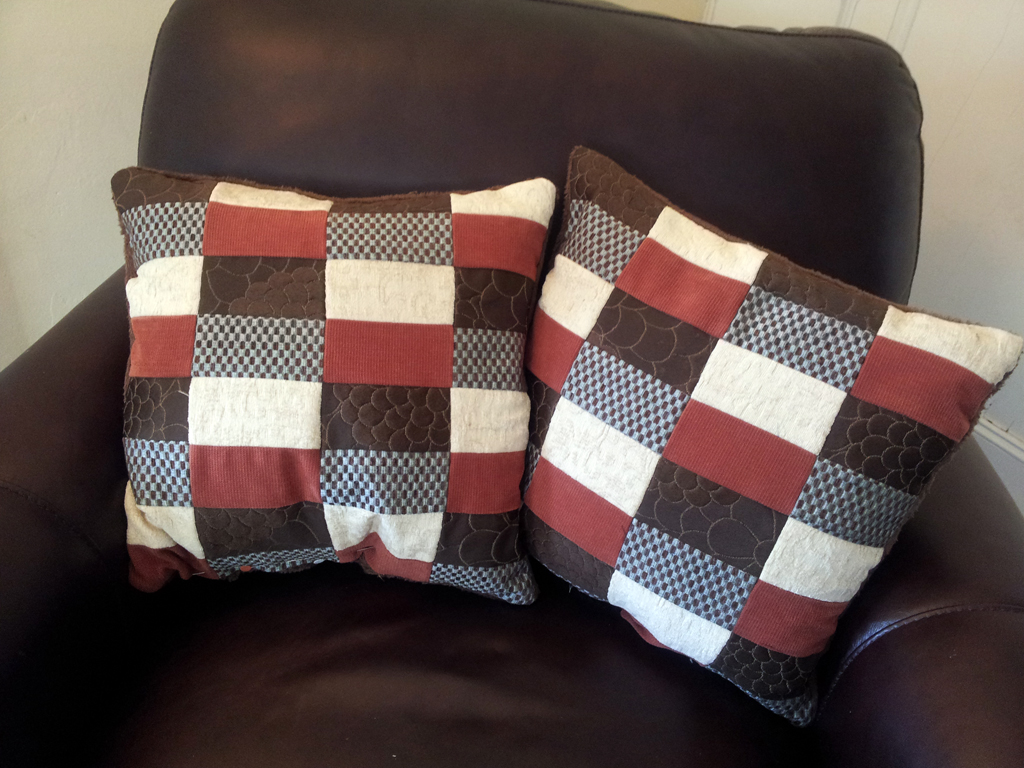
Our friend just moved apartments and bought a new couch set (which I’m rather jealous of, although it wouldn’t fit properly in our house). When we were shopping with him, he really seemed to like this one set of pillows that unfortunately didn’t really match the new set very well.
So, Carl and I decided that I should make simliar ones in colors that will match. It’s a very simple design of upholstery fabric and fuzzy stuff on the back (for cuddle-ability):
Ignore the slightly puckered bottom—it’s from the pins, because I still have to whipstitch them closed over lunch before delivery tonight.
The brown floral (which reads more like scales in some of the rectangles) is the same fabric as two of the pillows that came with the set—a happy find in the fabric store that will also help these blend in with the other pillows.
Here’s a super quick tutorial for how to make your own matching pair.
Materials
1⁄6 yard each of four different fabrics for the front (these were upholstery-weight)
½ yard of backing fabric (these were a cuddle fabric, but upholstery works too)
2 16″ pillow forms (or make your own. It’s better to have that extra layer of fabric than to just stuff the case you make)
Neutral thread
If you use quilt-weight fabrics, you probably want a yard of muslin to use as an interlining for the front and back, just to give it more body. Unless your 42″-wide quilt-weight fabric is also super square, you will need a bit more than 1⁄6 yard (you need a strip that is 6″×40″ for standard width, or 5″×48″ for wider fabric).
Cutting
Cut 16 3″×5″ rectangles from each of the four front fabrics.
Cut two 17″ squares from the backing fabric.
If you’re using lightweight fabric, cut 4 17″ squares from the muslin.
Construction
Because I recommend using heavy fabric, I’ve given all measurements assuming a seam allowance of ½″. Sewing a true ¼″ seam with upholstery fabric is annoying, fiddly, and begging for problems (not to mention it gives room to deal with the horrid fraying).
Front piecing
Pair up the two darker fabrics and the two lighter fabrics for the front (A and B, C and D).
Create blocks by sewing all of the A pieces to the B pieces along the long side. Do the same for the C and D pieces.
Construct the rows by alternating two AB blocks and two CD blocks. You’ll need four rows that start with AB and four that start with CD, with A and C always being at the top of the row.
Sew four rows together for each pillow, alternating the AB-starting rows and the CD-starting rows.
Making the pillow
One you’ve completed the fronts, place a front and back piece right-sides together. If you used light-weight fabric, baste a piece of muslin to the wrong side of each piece first.
Pin, then sew all the way around, leaving a 10″ opening on one side (or smaller, if you feel comfortable stuffing your pillow form in).
Turn out, clipping corners as needed.
Insert the pillow form through the opening, then sew the opening closed with a whipstitch or your preferred closing method.
I feel like I’m stuck in a cycle of “meh” projects—ones that are sufficient, but not awesome. This is another one of those, and I think all the blame lies on the blackboard cloth element.
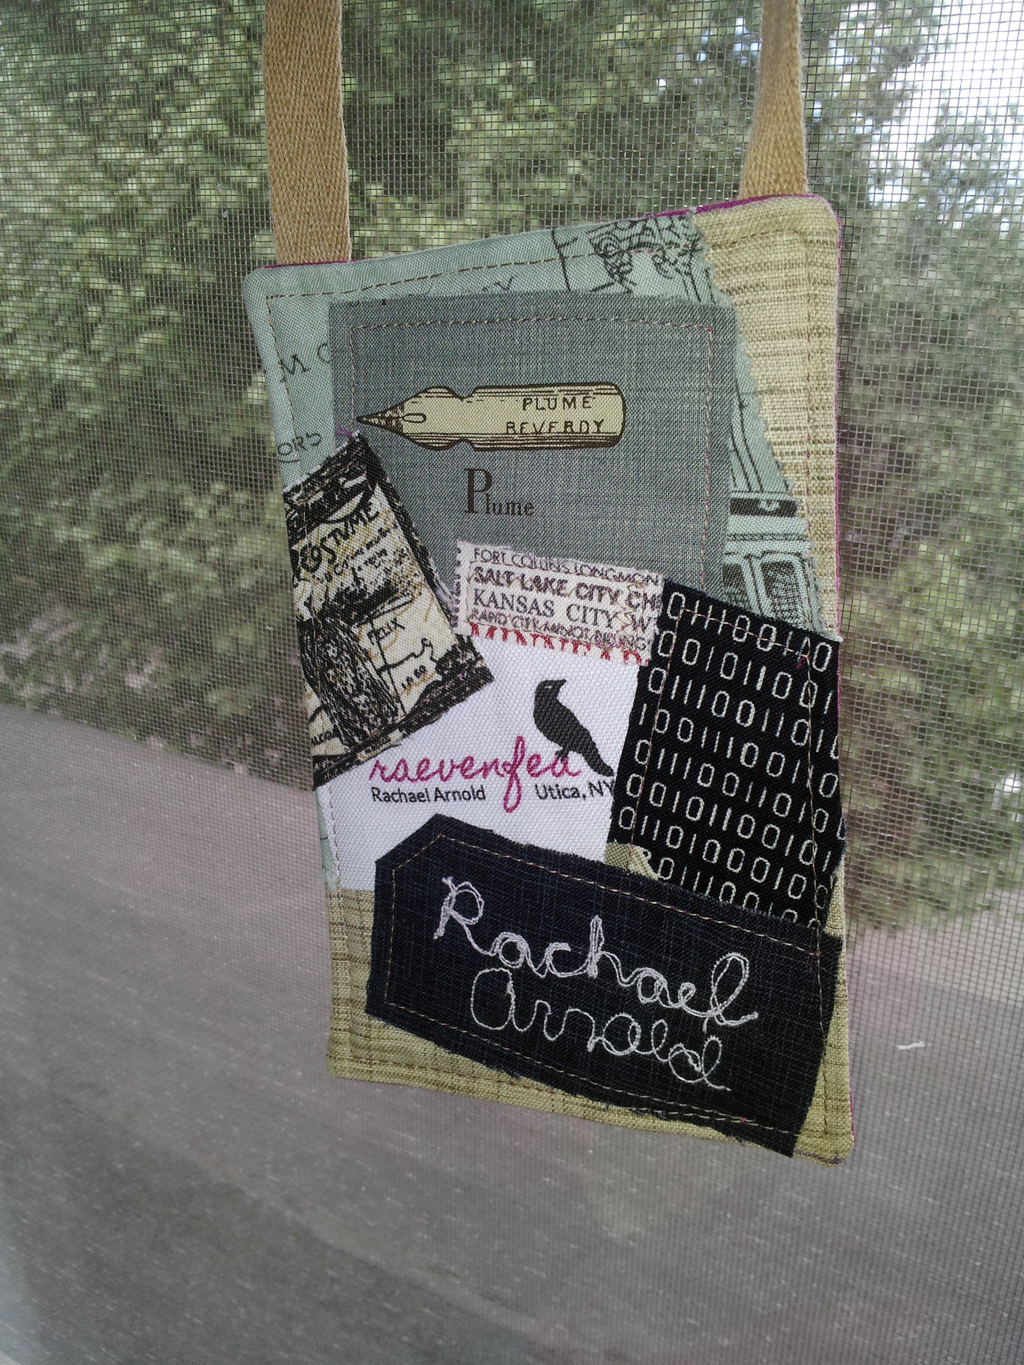
The quilt club is transitioning to having members make their own name tags this year. So, in order to give new members a bit of a grace period while still allowing them to have something with their name on it, I am making up a few new member name tags to lend out at meetings. At first, I was just going to make a window into which we could slip a bit of paper with their name on it, but then my imagination got away from me and I decided to try out Chalk Cloth.
Then, my wallet brought me back to my senses and I went for the off-brand blackboard cloth available from the local JoAnn, since I only needed an eighth of a yard or so and the LQS only carries the expensive stuff in one yard cuts. That might be my first problem?
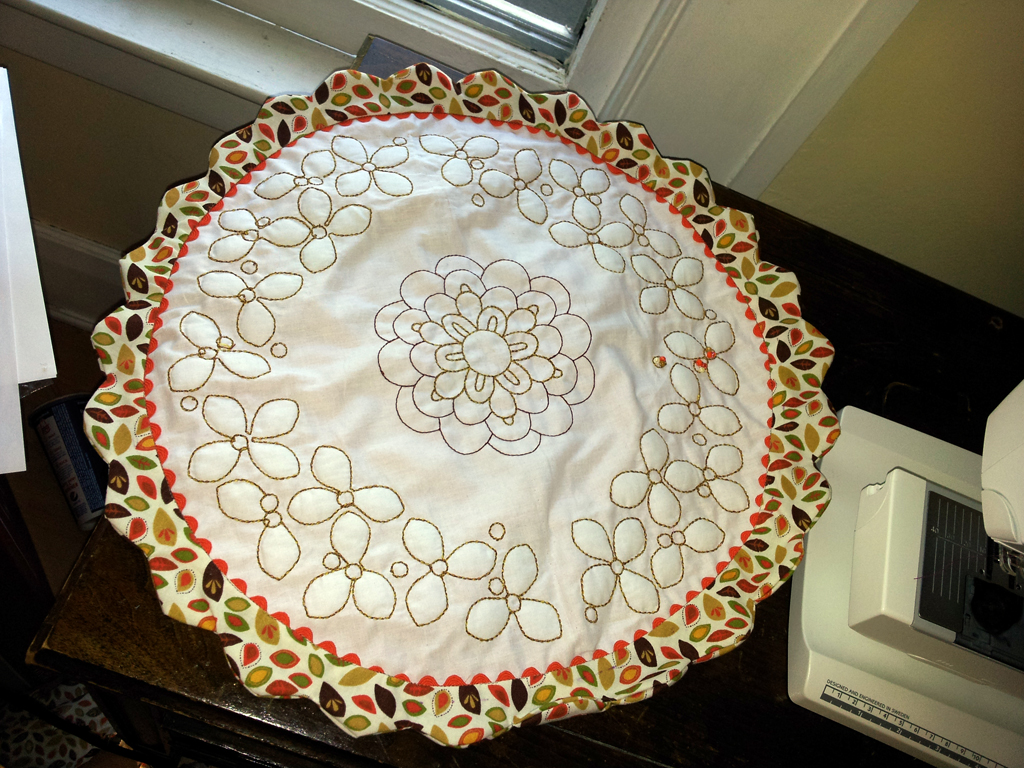
But anyway, I put my embroidery functionality, some twill tape, and a few charm squares to work last night, and ended up with what could be a pretty cool project:
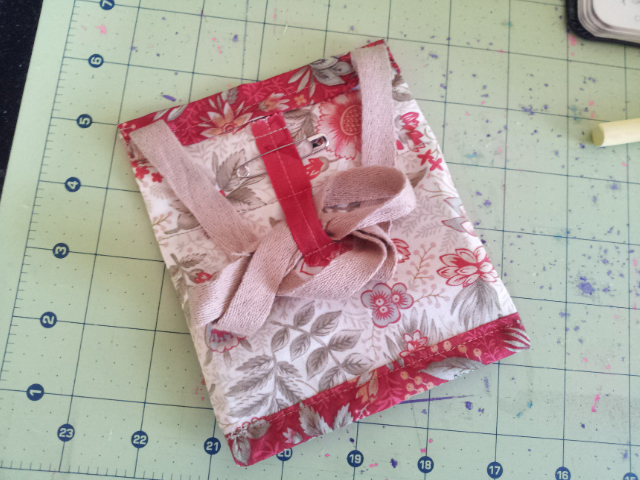
But notice all the yellow dust staining the edges of the fabric? Well, prior to sewing, I primed the cloth according to the directions (rub chalk on its side both vertically and horizontally, wipe, repeat, wipe (repeat again, for good measure), and you’re good to go), but somehow between priming it and finishing the sewing part, it became unprimed (with no heat or water involved).
So, I tried to reprime, but it just doesn’t work as well once it’s all put together.
So, I don’t know if I should continue in this vein or not. Perhaps I’ll try breaking the chalk so that it’s shorter, wash out the stains, and try to prime just the middle of the cloth.
But in theory, it is a pretty cool badge that can be worn around the neck, or have the strap tucked in and be pinned on instead.
I have another three weeks to play around with the idea. We’ll see what happens. (Also, I should probably get around to making my own…)
Update: I was too quick to blame the chalk cloth, I think. I bought a package of Prang Hygieia Chalk (it’s only 99¢ at Staples), and wow, is there a difference. I think the Crayola chalk I bought at the same time as the blackboard cloth is just worthless. Woes solved!
Do you have any experience with using Chalk Cloth or blackboard cloth?
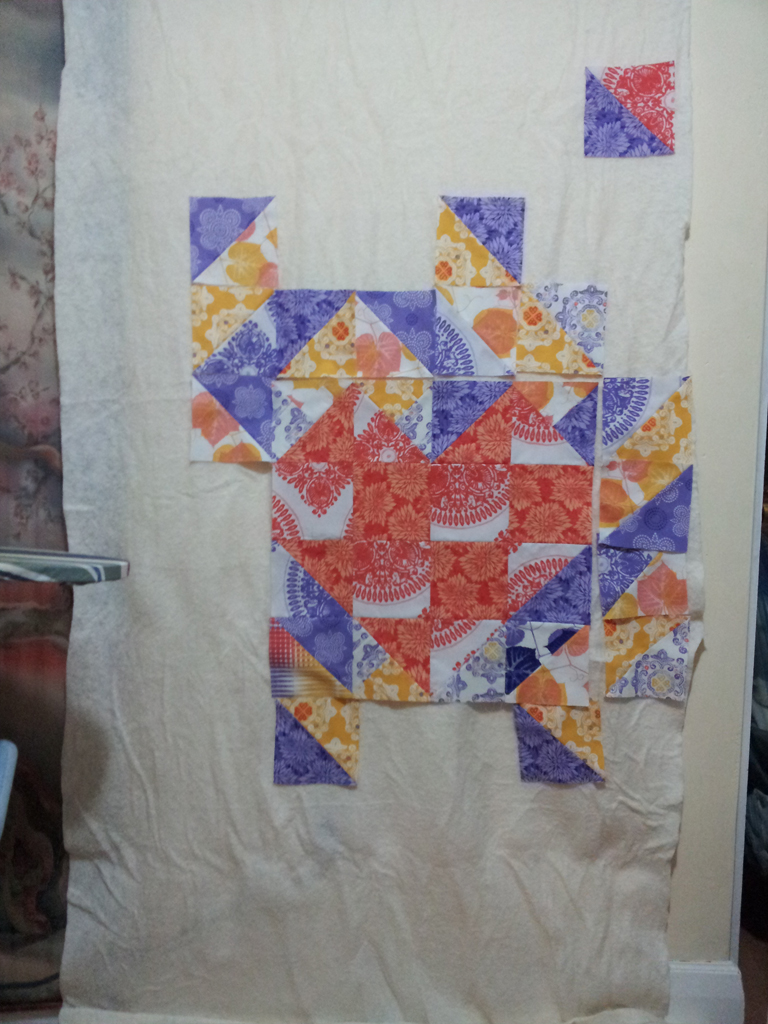
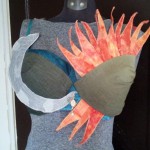
I’ve been procrastinating on larger projects (quilts, the Steampunk costume) by making small crafty things. The problem is, I’m now at a stand still, because I can’t decide whether to continue embellishing or just stuff them and sew ’em up.
One is for a class. It’s supposed to be either a table mat or a pillow. I don’t know what I want it to be. Probably a pillow, as it’s not all that flat. It is also supposed to have a ton of beading. I started the beads, but I’m just not feeling them.
What do you think. Beads or no beads?
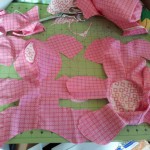
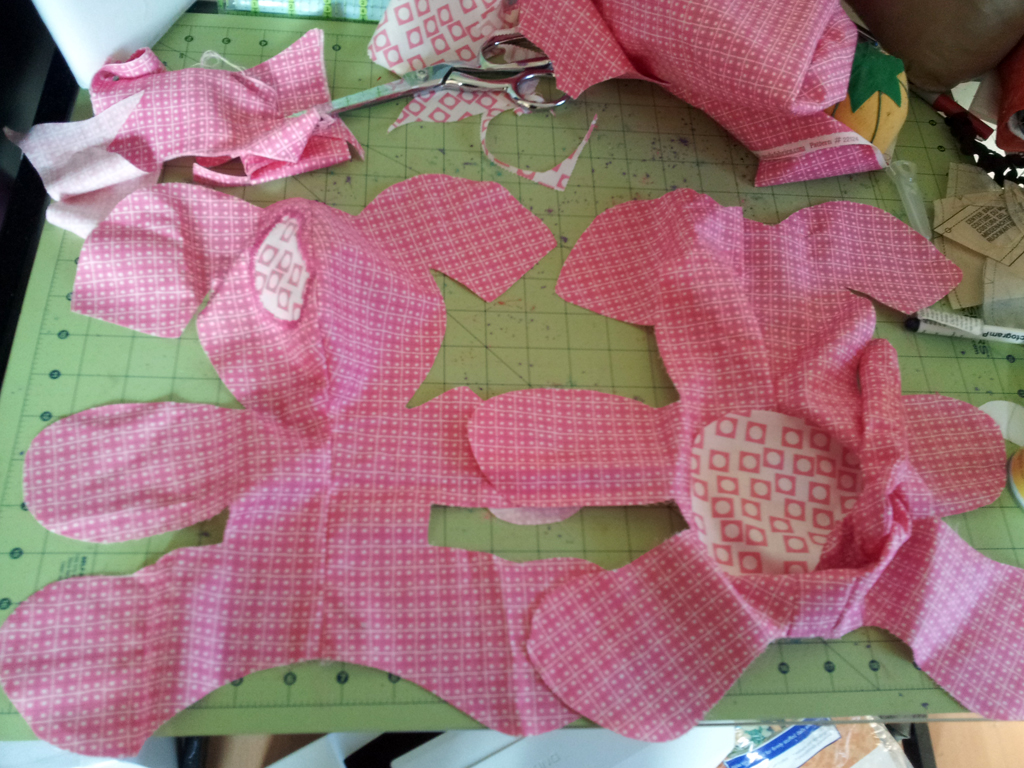
The other is yet another stuffed animal from Simplicity 2613.
I’m trying to modify it to look like a dog. In doing so, I decided it needed an eye spot, and maybe one on its back. But, I can’t decide if it actually needs the one on its back or if that is overkill. It really looks a bit more like a pig than a dog at this point, I think. I’m leaning toward no spot on the back (it’s just sitting on the back piece in the photo, not actually attached).
Most of the time when I hit this point, the project ends up in the unfinished and forgotten pile, but I need to finish both of these up in the next couple of weeks—the former for a discount at the next class, the latter for a gift. Maybe inspiration will hit between now and when I get off work this evening.
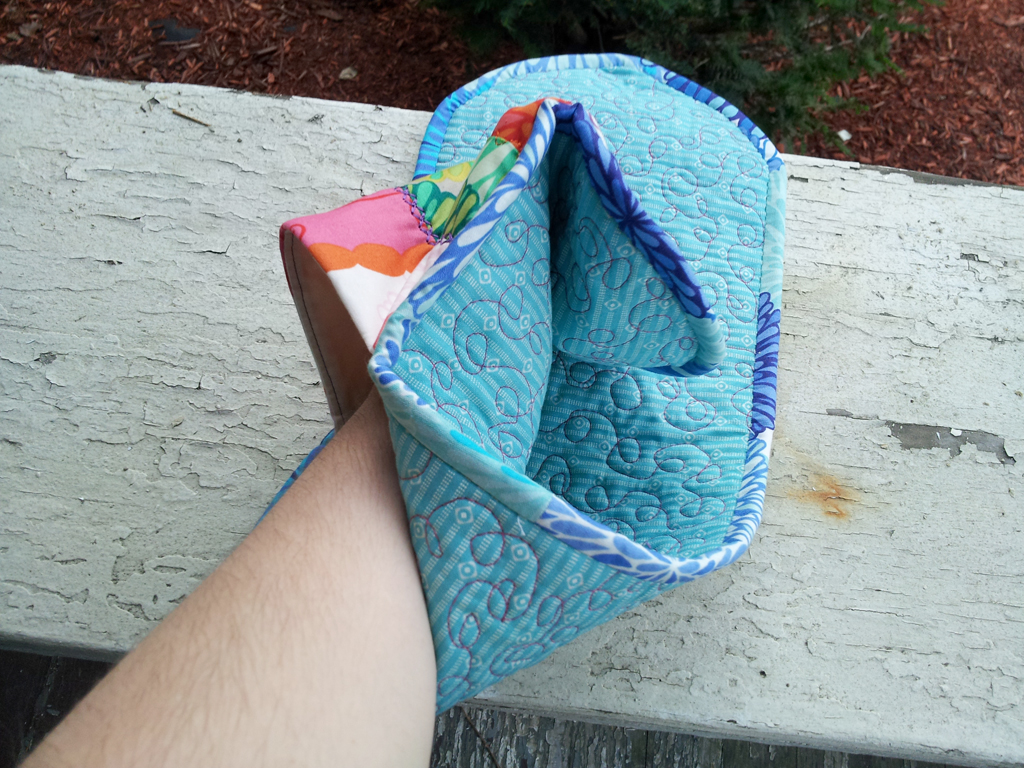
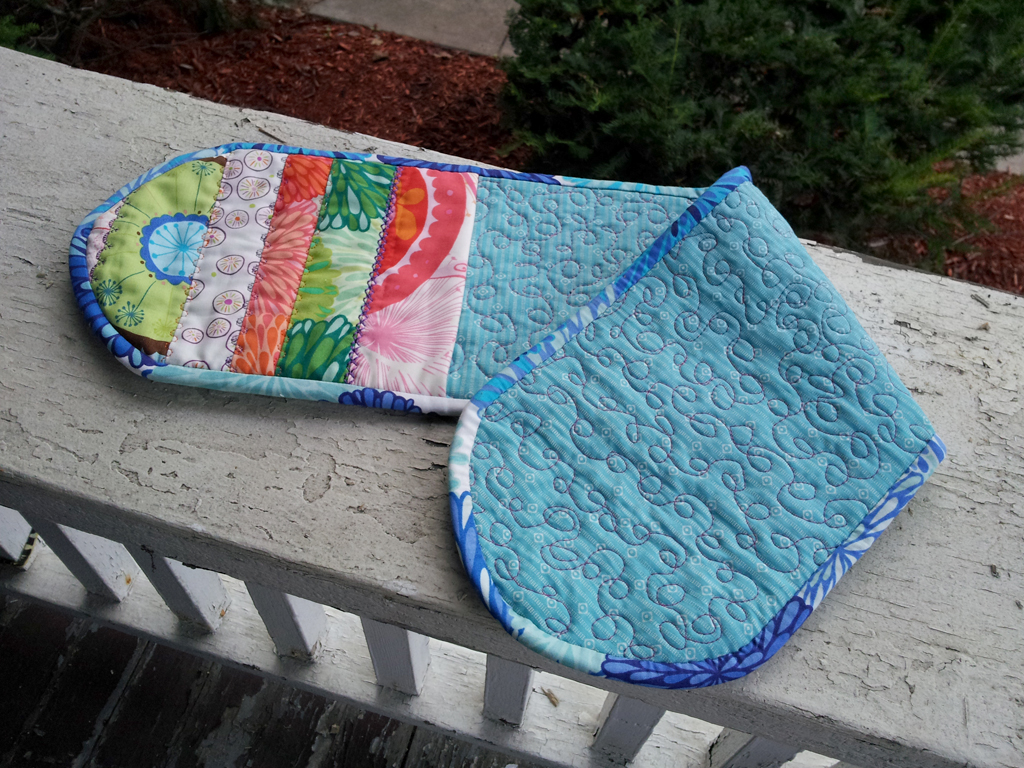
Here’s another quick project from a Viking class earlier this week. It’s a two-hand pot holder mitt. Frankly, I’m not entirely sure how well it would work out (especially since it’s overkill for anything we can fit into our toaster oven, being oven-less and all). I keep thinking I’d manage to burn myself somehow, or drop the pan, or something. It could make an interesting trivet, perhaps?
But, it was nice to get out and sew with some other ladies for an evening.
I’d forgotten I was on the waiting list for the class, so I hadn’t planned out fabrics or anything. I got a call rather last minute, so I ran home after work, grabbed what coordinating fabrics I could, and headed to class. The leftover strips are from the Designer Roll I used on the recent baby quilt and the background fabric is the closest coordinating fabric I had a half-yard of. Luckily, I had a strip of Insulbright the right width left over from some project I don’t even recall at the moment. It doesn’t match any of my decor. I think it may be destined for the club’s quilt show’s boutique next year.
Oh my, did the free motion part send everyone into a tizzy. Most of them were new to the concept (even the long-arm quilter in the class was scared of doing it on a domestic!) I tried to explain to them that mine only looked ok because that is the absolute one design I actually know how to FMQ, since it’s what I do on anything that I FMQ, but I don’t think they believed me.
Have you ever used one of these double-handed mitts? Do you like them?
I’m still working on quilting Carl’s gift. I’m trying to work on denser quilting (when called for), but the tradeoff is that it is taking hours and hours to do, and my non-ergonomic space means my back can only take so much at a time. I think I hit the official 2⁄3 finished point last night. In the mean time, here is another quick project I made recently. This was another class at the Viking Gallery sometime in June, but I just finished hand-sewing down the binding last night.
We’ve been doing a lot of work on the house, but we clearly haven’t gotten around to sanding and repainting the porch…
It is a case for a travel iron—be it for quilting/crafting or hair styling. The trick is that it has a layer of Insul-Bright so that you can put the hot iron in the pouch and go—no need to wait for it to cool down.
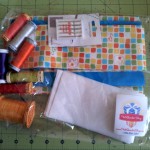
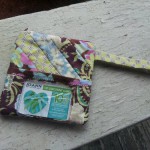
I needed a break from quilting my latest project, so I packed up my machine and went to a class at the local Viking Gallery. We made this simple zippered travel wallet.
Yesterday, I turned 26. I don’t recall ever thinking about myself at 26 when I was younger—I don’t tend to imagine myself at such-and-such age in the future. But, I am pretty confident that my teenage self wouldn’t have imagined me quite like this.
I live in New York, and didn’t return to the Midwest after graduating college.
Carl and I have been together for five years come August. We own a house. And a dog. And things like bedroom furniture.
I’ve determined that my mom can no longer blame me for her grey hairs, because I found one the other day and I don’t have kids to blame.
I quilt. I’m addicted to quilting and making other things with fabric. July marks two full years that I’ve been quilting, although I’ve been sewing for probably 20 or more, now.