A Market Tote à la Bijou Lovely
As a gift giver for Carl, I’m kind of lame: I usually get him things he needs but doesn’t want to spend his own money on (like jeans, sandals, etc…). For his birthday this year, I decided to supplement that with yet another item he maybe needs: a bag for his cycling stuff so that he doesn’t have to use our reusable grocery bags. This way he has a dedicated bag that won’t get co-opted for other uses.
Bijou Lovely has a great tutorial for a market tote that I based his bag on. Her instructions are clear, she has plenty of photos to illustrate what she’s talking about, and the result is a very roomy, practical, quick tote. For most purposes, it needs no changes.
Modifications
That said, it is a little feminine and has no pockets, which were two cons for my purposes. But both were easily modified.
Size and shape
The size is great, and really needed no change, except that I only had a half yard of the black bottom-weight twill I was using for the lining. So, instead of using a 19″ × 21″ piece for each side, I used an 18″ × 21″ piece. I didn’t change any other measurements. The outside contrast pieces are Kona Pepper that I had on hand, instead of the twill. Because the twill was more like 48″ wide, I was able to use it for the handles (with a bit of piecing). The exterior is a linen-look (and exaggerated texture) 100% cotton I found on clearance at JoAnn. I bought the ~2 yards they had left and a yard of purple just like it. I love it.
Don’t ask me to explain, because I am not sure why, but the shape of the bag is very feminine, to me. So, I squared it up a bit by increasing the depth of the corner seams. Instead of the 3.5″ called for by the pattern, I measured 4.5″ down from the corner point. I placed the handles so that they are on the seam-sides of the bag so that it holds its square shape when in use.
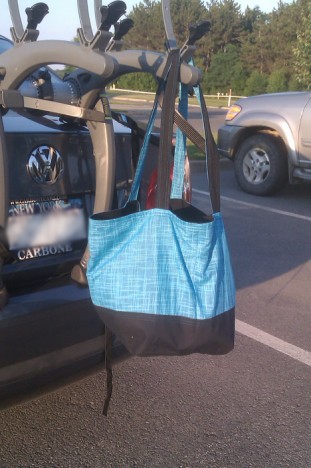
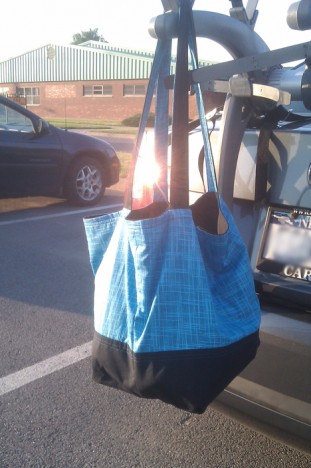
Oh, and I was lazy and running out of time, so rather than sewing the handles right-sides together and turning them out (I hate turning narrow tubes), I simply pressed the seam allowances down, put the two sides wrong-sides together and top-stitched about 1⁄8″ and ¼” from each edge. It’s not super pretty, but I was sewing this while he was on a bike ride, and needed to finish as fast as possible. They’re a little longer than the pattern calls for, as well, because I used half the WOF of the blue, which was wider than 44″ (I didn’t measure, but I think it was 54″).
Something to think about
I imagine Holly chose the 19″ size for a reason, but I think making this with 18″ × 21″ pieces (also known as Fat Quarters) would make a lot of sense. You could make a scrappy bag with five different FQs (one for each side, plus the last cut in half for the outside bottom contrast) and ribbon or webbing for the straps. Of course, if you have multiples of FQs that would also work to make it less scrappy.
How I sewed a zipper patch pocket
I won’t tell the story of the time he lost his $200 cycling computer after a race, but suffice it to say, the man needs a place to store his phone/computer/keys/cycling license/etc. So, I decided to make a zippered pouch inside the bag (and it gave me an excuse to use part of a FQ of Michael Miller’s Baby bicycle print I had).
Armed with a 9″ sport zipper, I cut out three pieces of the fabric: 9″ wide by 9″, 2″, and 1.25″ (I just guessed on how tall I wanted the latter two). When cutting, I forgot about the whole seam allowance thing, but had I been thinking, I would have cut them all 11″ wide so that I could use the full zipper. Instead, I had to shorten it, but I’ll talk about that later.
First, I added interfacing and pinked all the edges so that I didn’t have to do much finishing and the pocket will be nice and sturdy.
Next, using pieces cut off the 1.25″ × 9″ strip, I pressed under ¼” on one side of each and pinned them to the ends of the zipper, right-side up like this:
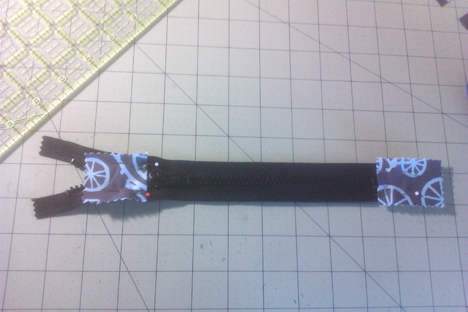
The end on your right is the factory-finished bottom of the zipper (1″ up from the end of the zipper tape), the other is placed where I wanted the zipper to stop when closed. The rest of that strip becomes scrap.
After creating the ends, I aligned the edges of the other two pieces with the edge of the zipper tape, right-sides together, and sewed the zipper to each, using my zipper foot. For this, your fabric pieces should go over the zipper teeth when sewing, and then you fold down to uncover the teeth, making a neat seam. Because you sew along the full length of the zipper tape, you’ll also be making a seam along the pinned pieces of fabric on the ends.
You’ll end up with a patch that looks like this before it’s all trimmed:
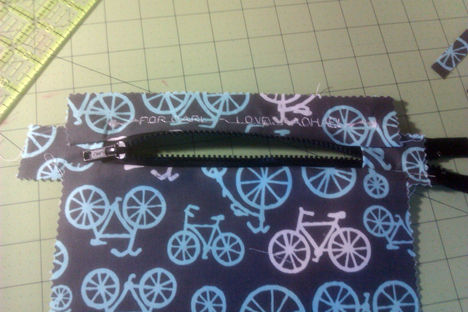
Trim off any overhanging zipper tape and fabric from the edges, and cut off any teeth that extend more than .5″ beyond the end of the zipping area. You should have approximately 1″ on either side of the zipper ends, so that you can have a .5″ seam allowance when patching the pocket to the bag. To help judge your .5″ seam allowance, you can machine baste around the entire pocket. You’ll end up with something like this (the top edge has been folded down and ironed in preparation to sew it on as a patch).
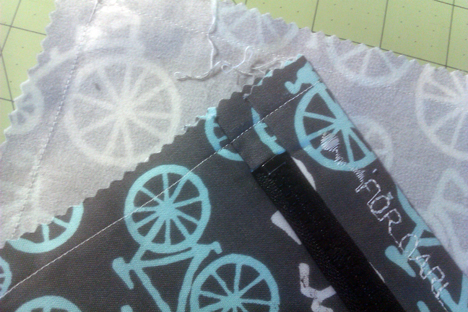
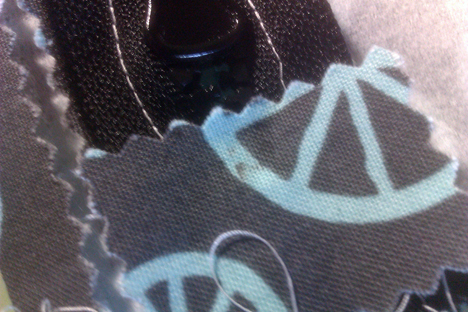
Once you have the pocket sewn on, you shouldn’t have to worry about the zipper going off the end of the teeth, but if you are worried about the shortened end and have a plastic zipper, you can press the extra teeth back together with your fingers, then place a scrap of fabric over them and press the point of your iron over it for about 30 seconds while on the cotton heat setting. It’ll fuse the teeth together. I left my scrap covering it, as it’d somewhat fused to the teeth. You can see the black plastic coloring seeping through where fused here:
To add your pocket to the bag, arrange the pocket on one of the lining pieces (or the outside, if desired, after you’ve sewn on the contrasting bottom piece) where ever you’d like the placement to be. It’s easiest if the zipper is closed at this point. Then, stitch all the way around the pocket 3/8″ from the edge. I did a straight stitch and then did a multi-stitch zig-zag (meant for stretch fabrics, this looks like a normal zig-zag stitch, but will have more than one stitch from side to side, leaving you with a stronger stitch) along the edge for strength.
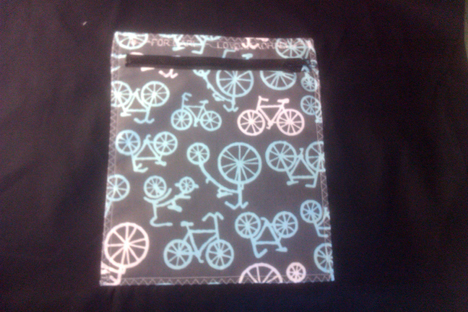
And that’s that. Here’s the link to her tutorial again. Good luck with your own bag sewing!
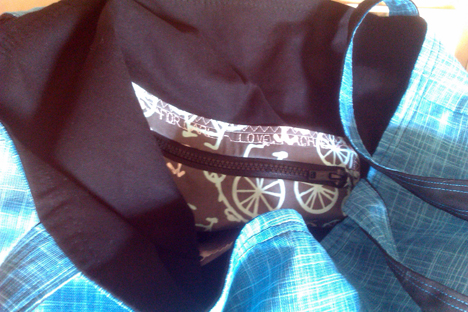
Have you made Holly’s Market Tote? Did you modify it? What kind of features does your ideal tote have?


Comments are closed.