This is a static export of a blog I put on ice many years ago, that still has personally relevant content. No promises can be made around linkrot, styles, or working functionality.
Once I’d accumulated enough college tees, I took a pair of scissors to all the high school ones I’d toted north with me (or, I pressed my sisters into that service), planning to make a t-shirt quilt despite having no idea how to quilt. I was left with various half-shirt chunks, which were far less bulky to move around.
Surprisingly, most of those scraps made it through various moves (often as packing materials), and found their way into my sewing closet at the apartment. After decluttering a variety of other things over the long weekend last week, I decided it was past time to do something with the almost-rags.
Now I have a pile of pressed, interfaced squares and rectangles awaiting piecing. I imagine these will sit in a box for a while yet as my college tee pieces did, but progress is progress.
In addition to eight t-shirts (some with printed backs), I finally cut up my hoodie and baseball jersey. There’s not enough for a decent-sized quilt with just those 17 pieces, so I played in Illustrator and came up with a design that adds in scraps from the jersey with a yard(ish) of purchased fabric.
I may change my mind in the future, of course, but I rather like it right now.
I’m working on a new baby quilt that looks like a very large, squared-off puzzle. It boils down to a bunch of 8″ blocks, but I haven’t yet found a way to batch process them—I have to make each one individually to make sure it has the right fabrics to match up with the next in line, as a piece of each block’s fabric needs to end up in two different adjoining blocks.
But, I did sketch out the whole quilt with fabric placement, so it’s moving along steadily without too much ripping. Here’s a blueprint for the blocks.
We’re heading off on a week and a half-long vacation, first delivering this quilt in NY and visiting Carl’s family, then on to MO to visit my family. Forgive the photos, as we took them the night before leaving on our trip. Hope you’re having a wonderful time celebrating the holidays!
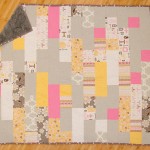
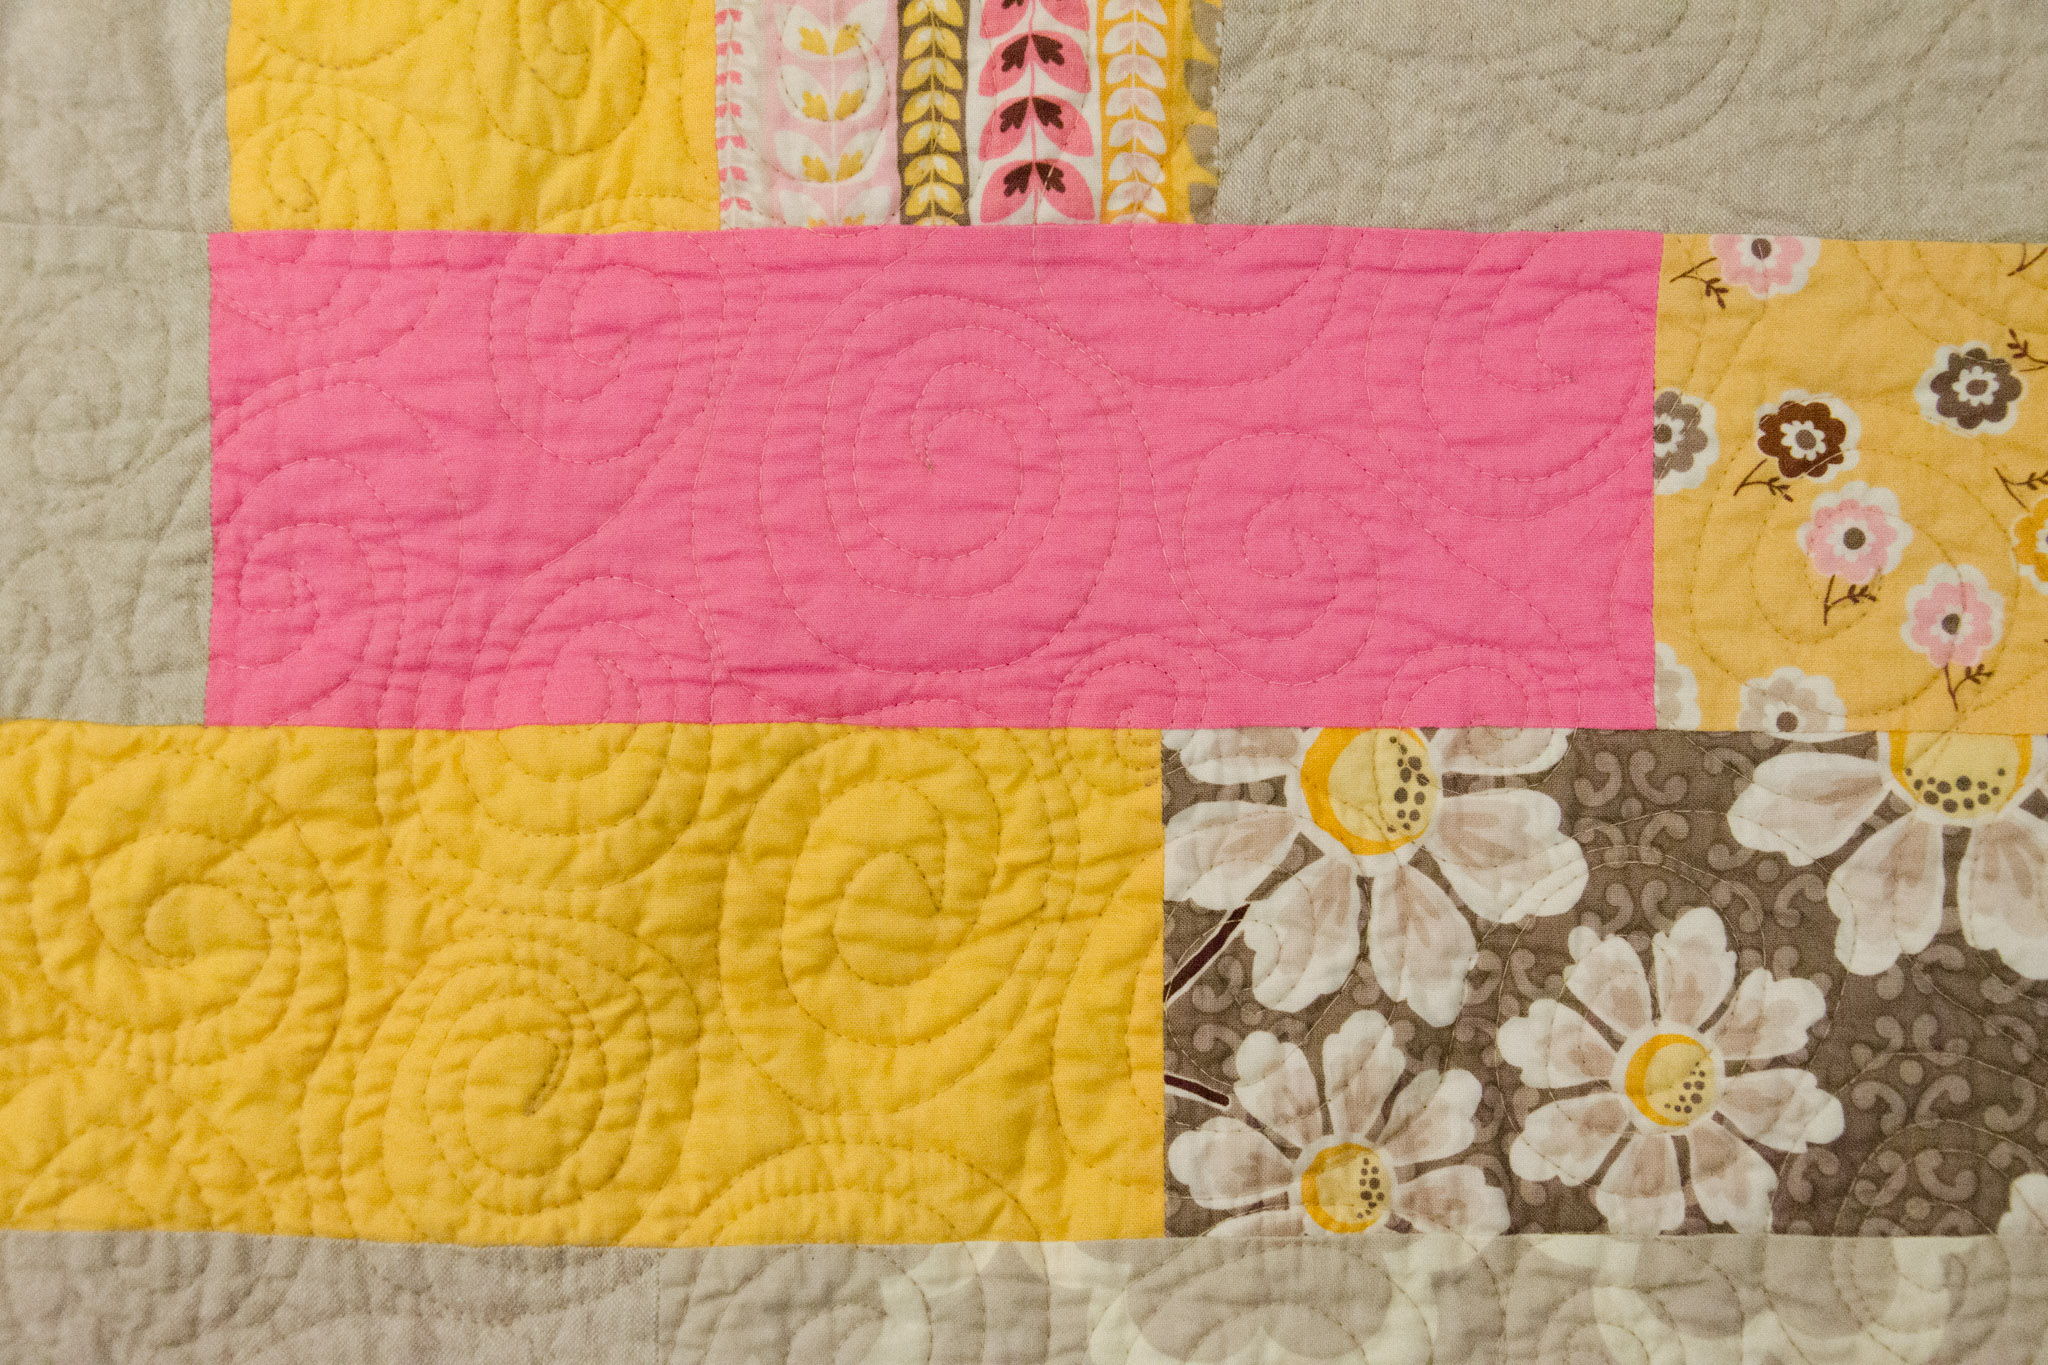
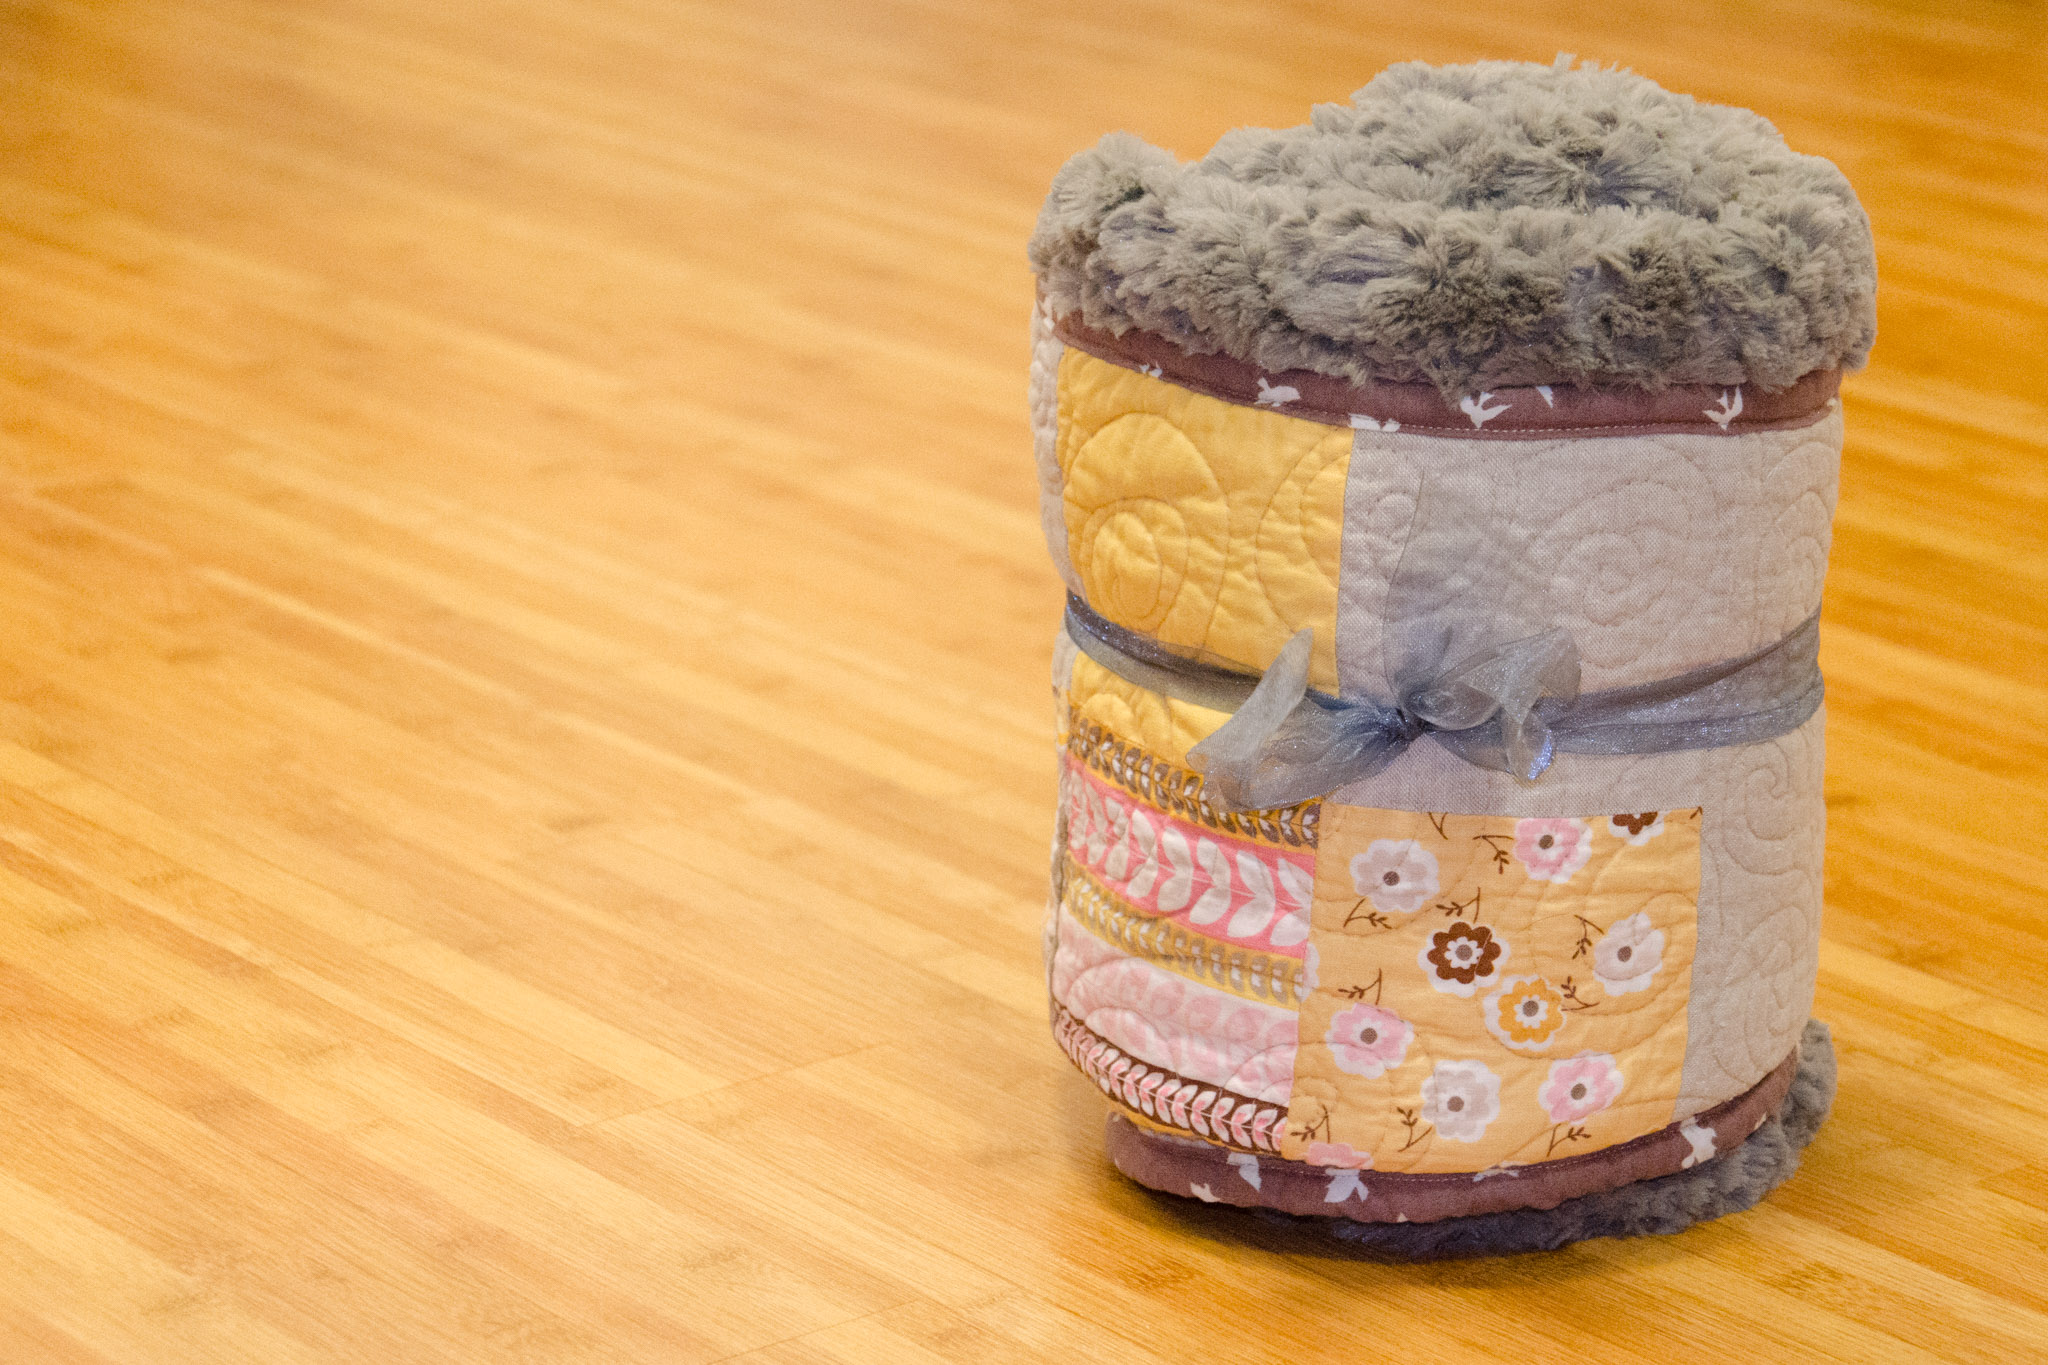
If I’m going to stick to a formulaic fabric selection, I thought I should at least mix up the shapes I’m using. However, a condensed timeline dictated simplicity, so I stuck with squares and rectangles. This stack of six fat quarters from Daisy Cottage; fat quarters of a generic pink solid, Kona Sunflower, and Fairy Frost in snow; and a yard of Essex Yarn Dyed in Flax went together quickly, but the values in the fabrics didn’t work out as well as the stack of blues and greens for the layout I used in Mustang Summing, so I mixed up the layout.
“V’s Morse Message” (sideways, top is on right of photo), Rachael Arnold, December 2014, 48″x56″. Photo by Carl Pfranger.
The result is a message to our new niece spelled out in Morse code, with the yarn dyed serving as spacers between letters and words. The whole thing is built on a 4″ finished grid, as I started with 4.5″ strips cut down into squares, 8.5″ rectangles, and 12.5″ rectangles. It finishes at 48″x56″.
“V’s Morse Message” (detail), Rachael Arnold, December 2014, 48″x56″. Photo by Carl Pfranger.
I feel bad admitting this, since the quilt became a gift (sorry, V!), but I had such a hard time focusing on this quilt. I cut the fabric into strips soon after finishing Mustang Summing, but kept procrastinating on starting. Originally, I was going to make an equilateral triangle quilt. Then we found out a new niece was being added to the family, so it became her quilt. It took until the day she was born for the idea of Morse code to inspire me. Maybe I was just holding out for the spark.
“V’s Morse Message” (detail), Rachael Arnold, December 2014, 48″x56″. Photo by Carl Pfranger.
The back is nice and soft, courtesy Minky in the Dynasty pattern, oyster color (although the quilting hides the pattern). There’s low-loft cotton in the middle, as usual. I quilted it in an all-over swirl using Aurifil thread that I picked up from the local quilt shop. I forgot how much my machine loves this thread. The binding is a print from Brambleberry Ridge by Violet Craft.
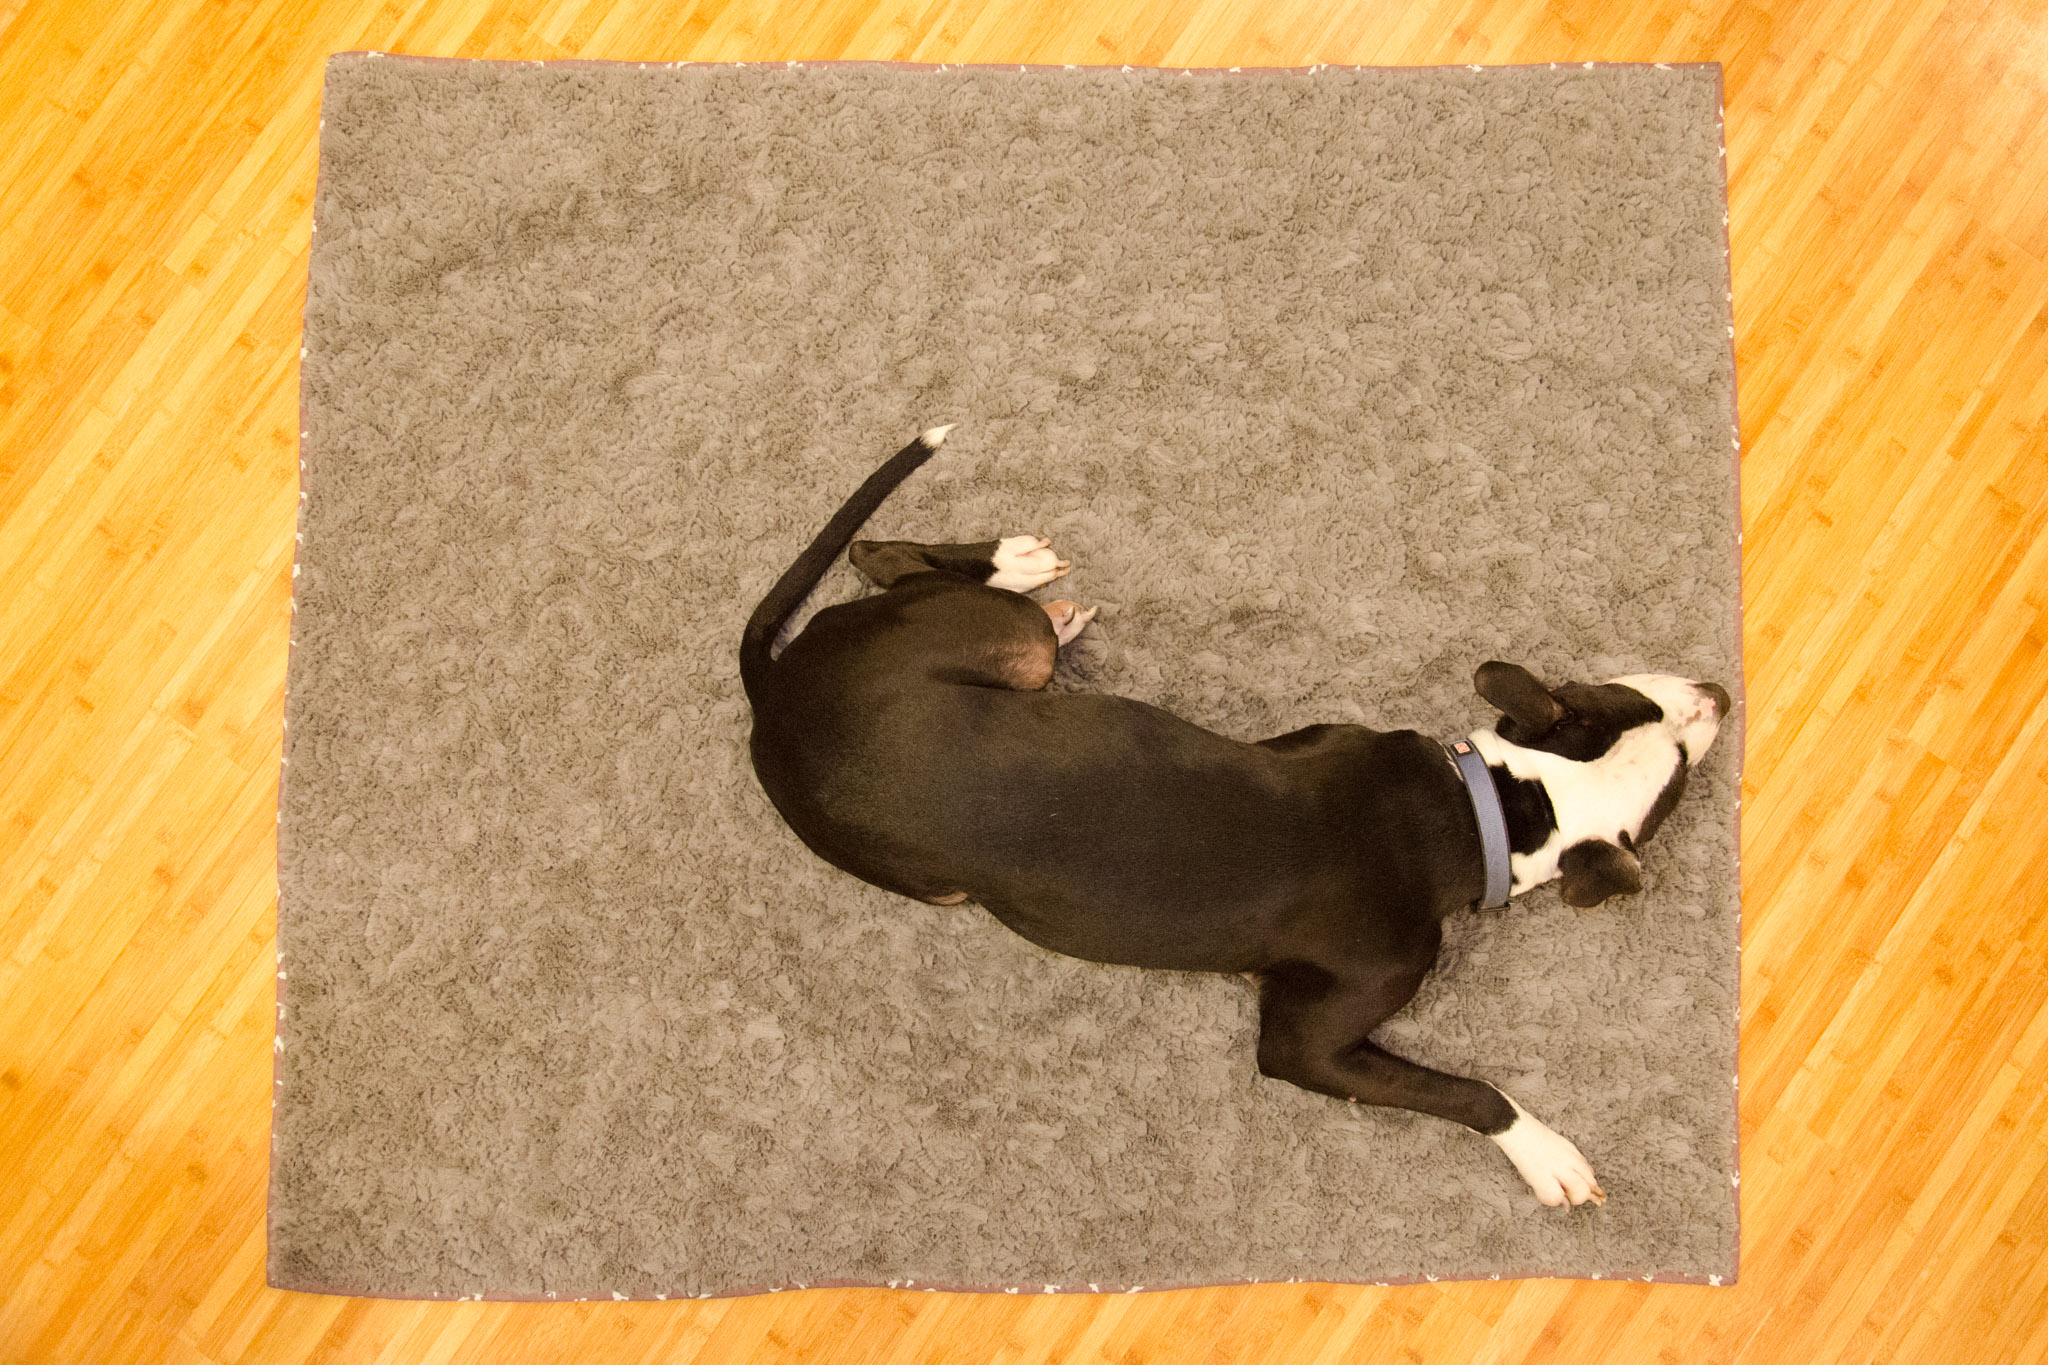
“V’s Morse Message” (back), Rachael Arnold, December 2014, 48″x56″. Photo by Carl Pfranger. Moof decided the back needed a little something extra for the photo.
Since I didn’t expect to finish any more quilts in 2014, I didn’t have any labels to put on this one. For now, there’s a handwritten one on the front. Perhaps I’ll have to add another in the coming months once I order more.
“V’s Morse Message” (detail), Rachael Arnold, December 2014, 48″x56″. Photo by Carl Pfranger.
I hope the size of this can grow with her and keep her warm for years. Now I need to get started on quilts for her siblings!
Two things burrowed their way into my subconscious during six months of not quilting this year: all the plus quilts floating around blogland / Pinterest and the new kids on the fabric block, Cotton+Steel. It shouldn’t surprise me that I brought home a fat quarter pack from the local quilt shop comprising prints from Cotton+Steel (and coordinating solids, a coordinating Cloud9 print), nor that my brain immediately thought “plus quilt”! Add in a yard of Olive Essex Yarn Dyed linen/cotton blend, et voilà: Mustang Summing.
“Mustang Summing”, Rachael Arnold, October 2014, 48″x56″. Photo by Carl Pfranger.
I sketched out the layout in Illustrator, aiming for something in the 50″ range on each side, moving things around until I was happy. The arrangement that looked right used 4.5″ unfinished squares, making the quilt 48″x56″. In hindsight, I could have used 5″ squares with the fabric I had, but I have a serious problem about miscalculating the number of squares from fat quarters.
“Mustang Summing”, Rachael Arnold, October 2014, 48″x56″. Photo by Carl Pfranger.
In software engineering, we say that good programmers are lazy programmers—good code doesn’t have tedious, repetitive sections because we generalize things to save typing, and automate anything we can. In quilting, I often think the adage is inverse—a good quilter is masochistic and likes using as many small pieces as possible in repetitive ways. More often than not, the engineer in me wins out. I used two 4.5″ squares and a 12.5″ rectangle for each plus rather than make them entirely from squares (except for the three that I cut wrong, which are five squares). Less cutting and less seaming makes piecing more efficient. If only I could automate the cutting with technology I have at home.
“Mustang Summing” (detail), Rachael Arnold, October 2014, 48″x56″. Photo by Carl Pfranger. You can see my cutting mistake in the navy/aqua plus.
I love the warm brown/olive tone in the Essex Yarn Dyed (and how it blends into a warm gray from a distance), and let that guide my choice of quilting threads—a heavyweight russet Gutermann poly thread. I kept the quilting simple, echoing the seams, with Nature’s Touch White batting in the middle.
“Mustang Summing” (back), Rachael Arnold, October 2014, 48″x56″. Photo by Carl Pfranger.
It took a while to solve the problem of backing and binding. The first backing yardage I purchased was too cool, the scraps from the top too few, and nothing in my stash inspired me. I finally settled on another yard dyed linen, mixed with a column of strips leftover from the top. I settled on a plain blue solid (Kona Nightfall) from the stash to bind it.
“Mustang Summing” (back detail), Rachael Arnold, October 2014, 48″x56″. Photo by Carl Pfranger.
With this finish, I’ve completed more quilts this year than I did in 2013, despite not quilting for six months. Things go so much more quickly when I actually complete everything I start! As of now, the only unfinished project I’ve started this year is a corset that I spent a few hours on back in May. Not too shabby.
“Mustang Sally” was stuck in my head the entire time I worked on this quilt. Thus the name, if you can make the same mental leap I seemed to do.
Thine arms are ever warm,
Thine arms are ever warm.
Memory still shall close enfold,
Bringing us joys of days of yore;
Faith shall thy constant fame uphold,
While years, Carissima, grow cold.
We love thee evermore, We love thee evermore.
Like most residential college students, I lived in school t-shirts while pursuing my undergrad degree. Then, as I moved along in my professional career, I found myself wearing them less often (hastened by the fact that I lived a mere 15 minutes away from my alma mater). When we packed for our move to Vermont (downsizing in the process), I refused to move the bag of shirts yet again so, I spent some time one afternoon fusing on interfacing and cutting the shirts into future quilt pieces. Those took up far less room in packing boxes.
Now—eighteen months later—it took just a single evening to piece them into a quilt top. All told there are 21 shirts represented (some with multiple squares depending on their print design).
“Carissima / A snapshot of HC 04’–08’”, Rachael Arnold, October 2014, 58″ x 60″. Photo by Carl Pfranger.
It’s a partially-complete capsule of my four years—music, dorms, publications, social justice, just plain social, and a summer internship that set me on the road to my career. I even designed a couple of the shirts (and countless posters, event invitations, and publication layouts). It’s oddly lacking in reference to my major (I still wear our hoodie) or the on-campus internship that ate up over 20 hours of every week (and a few summers).
Carissima / A snapshot of HC 04’–08’” (detail), Rachael Arnold, October 2014, 58″ x 60″.
For backing, I spray-basted two layers of fleece in the school colors (“buff & blue”, or in this case Joann Fabrics Anti-Pill Fleece in Camel and Navy Blue Tartan), then sewed the outline of an ‘H’ shaped after the official logotype. After cutting out the top layer inside the ‘H’, I zig-zag stitched around the cut out to secure it before basting the top to the two layers of fleece. Eagle-eyed readers will notice it’s slightly narrower than square; I trimmed off an inch from both sides so that I didn’t need to piece the 58″-wide backing fleece.
Carissima / A snapshot of HC 04’–08’” (back), Rachael Arnold, October 2014, 58″ x 60″. Photo by Carl Pfranger.
I chose to hand tie the quilt rather than machine quilt it for no reason other than wanting to tie a quilt. Again, I went with the school colors, using embroidery floss I had at home (DMC colors 842 and 823, inherited from my grandma). It was not easy pulling two full-thickness strands of embroidery floss through the layers, but a few TV marathon sessions (a habit started in college) and a few large tapestry needles got me through.
Carissima / A snapshot of HC 04’–08’” (detail), Rachael Arnold, October 2014, 58″ x 60″.
In my haste to finish it, I made a rookie mistake of using unwashed cotton binding (Moda Bella Solid Royal), which shrank in the wash. It’s usually not an issue—I don’t prewash fabrics so they all shrink together, but well-worn t-shirts are another matter. The result is a slightly rumpled edge and corners that like to turn up. It just adds more character in a memento of four years full of it. I’m looking forward to cozying up with this during my second Vermont winter. With two layers of fleece, it’s quite warm!
Carissima / A snapshot of HC 04’–08’” (detail), Rachael Arnold, October 2014, 58″ x 60″. Oh Hamilton, staunch Hamilton, why so serious when I offer you a cozy quilt?
I hope you’ll forgive me for delaying this post for a couple weeks for photo purposes. It seemed fitting to wait until we drove back to Utica for a weekend, giving us a chance to take photos on “The Hill” where it all started. The weather didn’t cooperate, but it certainly brought back memories. Also, there’s no small amount of irony that the Dark Side tee anchors the quilt (as well it should, considering my dorm choices for three years), yet we took all of the photos on the light side of campus. It fits.
Early in my quilting adventures, I was guilty of starting many more projects than I finished. Case in point: this quilt started life in April 2011, but a block disappeared as I was piecing them into rows and I quickly moved on to newer, shinier projects. In the 43 months between then and now, the almost-completed top and its scrap fabric have migrated from box to bin to box, apartment to house to apartment. So consigned to oblivion, it wasn’t even mentioned in the unfinished projects lists in my yearly review posts of 2012 and 2013.
“Bird’s Nest Quilt”, Rachael Arnold, October 2014, 38″×50″. Photo by Carl Pfranger.
I started the top shortly after buying a Jellie roll and the book Two from One Jelly Roll Quilts by Pam and Nicky Lintott. It’s made from alternating 6″ nine patches and snowball blocks, using 2.5″ strips and a background fabric for the snowball (in this case a Target cotton sheet set clearance buy). After one of the blocks went missing, I bought a charm pack of the fabric with which to recreate the stray block, but never followed through on piecing it.
“Bird’s Nest Quilt”, Rachael Arnold, October 2014, 38″×50″. Photo by Carl Pfranger.
The host of unfinished projects in my sewing closet has lately become mental as well as physical clutter, demanding commitment. I unboxed this one while considering co-opting the backing fabric for another quilt you’ll see soon. Instead, I finished piecing it while waiting for a different fabric to ship for the other quilt. When I opened the box, the missing block was there on top—found and again forgotten at some point over the years. A few seams, two borders (most of which were already pieced), and it was done in the span of an hour. I’m glad it was a simple quilt design; I de-stashed the book a year or two ago.
“Bird’s Nest Quilt” (detail), Rachael Arnold, October 2014, 38″×50″. Photo by Carl Pfranger.
To fit the bird nest theme, I used a stashed embroidery quilting bird motif to quilt some of the snowball blocks and two of the corners. The rest of the blocks are quilted with an all-over swirl design, the borders feathered. The sheeting fabric was somewhat difficult to quilt as it didn’t glide over my machine like quilter’s cotton does, but my free-motion skills aren’t perfect anyhow. All the free motion made for quick work—it went from basted to quilted in a single evening.
“Bird’s Nest Quilt” (back), Rachael Arnold, October 2014, 38″×50″. Photo by Carl Pfranger.
And so my sixth quilt start became my thirty-second quilt finish. Working with the older piecing, I could tell how my skills have improved—small betterments became a substantial change that I hadn’t otherwise noticed. There’s also something to be said for ease of working with high-quality fabric instead of the cheap stuff this is made of.
“Bird’s Nest Quilt” (detail), Rachael Arnold, October 2014, 38″×50″. Photo by Carl Pfranger.
In the end, I didn’t need that charm pack at all, although a few charms made it into the binding when I found myself short on the brown texture. Perhaps I’ll make a pillow or two to match—I still have an entire twin sheet plus scraps of the background and backing fabric. Regardless of its future, it feels great to recover the storage space and knock another unfinished project off the list.
“Bird’s Nest Quilt” (detail), Rachael Arnold, October 2014, 38″×50″. Photo by Carl Pfranger.
In the realm of quilting, this is hardly an “old” project to finally finish. What’s the oldest project you’ve ever dug out of a box and finished up?
The last time I mentioned my english paper piecing project (blocks from Lucy Boston: Patchwork of the Crosses), I’d sewn together about fifteen pieces—not even half a block. That was two years ago. Unlike many of my once-mentioned (even twice-mentioned) projects, I have continued to work on this one, albeit unhurriedly.
English paper piecing blocks, Rachael Arnold, October 2014.
I go through phases where I’m content basting the individual pieces to their paper foundations, and make a bit of progress that way.
English paper piecing blocks, Rachael Arnold, October 2014.
Then, I go through phases of piecing some together, building blocks a bit at a time.
English paper piecing blocks, Rachael Arnold, October 2014.
This is where it stands after a bit more work while we traveled to New Jersey to see family last weekend.
English paper piecing blocks, Rachael Arnold, October 2014.
In another two years or so, I may even finish an entire block.
A bit sooner than anticipated (prompted by a comment from a reader), here’s the next edition of my Half-baked Blueprint series. Remember, these are not patterns; think of them as rough outlines of the inspiration, math, fabric, and techniques I use in some of my quilts—there’s a lot you’ll have to fill in yourself. My hope is that it will inspire other quilters to play with quilt top designing rather than always reaching for published patterns.
Three years ago, I pieced the Lollipop Baby Quilt quilt improvisationally, initially aiming at creating a straight-forward Jelly Roll Race quilt (albeit with a strange non-standard roll of half-strips). Halfway through, I paused to do a few quick math calculations and chose to piece it in four sections.
Supplies for the Quilt Top
20 2.5″ x width of fabric strips
Assumptions
All of your strips are between 40-44″ long, with the selvages removed.
You’re piecing straight across the strips, not diagonally as in some Jelly Roll Race quilts.
If you want to piece the strips diagonally, you’ll need three (3) extra strips, 23 total.
You’re sewing the strips together with an exact 1/4″ seam allowance.
Jelly Roll Race quilt measurements are inexact by nature—the whole point is to just sew everything together and square it up at the end, if needed. Piecing blocks is largely the opposite—you need relatively precise measurements so that everything joins up correctly. To mesh the two, you need to be willing to deal with both.
The (Mostly) Inexact Parts
This is just basic Jelly Roll Race quilt making, but you stop mid-way through.
Sew all 20 strips together, end to end. You should have a strip that is at least 800″ long. If it is shorter, you need to add one more strip. If it is longer, that’s great. Most of the time, it should end up around 820″ long at this point.
Cut exactly in half, then sew the two strips together along the long side. Now, you should have something that is 4.5″ x 400″ or longer. Square up the ragged end if needed, but try to not cut off too much.
Cut in half, sew along the long side, result should be 8.5″ x 200″ or longer (4 strips tall). Square ends if needed.
Once more. Cut in half, sew, result should be 16.5″ x 100″ or longer (8 strips tall). Square ends if needed.
Now stop.
The (Mostly) Precise Parts
The finished quilt is just 6 squares cut from your strip set.
Cut six 16.5″ blocks off (you should have a few inches leftover—discard it, use it on the back, or in a different project), then sew the blocks together in three rows, where rows one and three have stripes vertically, row two has them horizontally.
You now have a completed quilt top.
Other Options
A whole standard jelly roll can make a 48″x64″ quilt. You’ll use 40 strips. You’ll start with a pieced strip 1600″ or more long. Your finished strip set will still be 8 strips tall (16.5″), but 200″ or longer, and you’ll cut 12 squares. Just remember, not all rolls have the same number of strips, and you’ll need more strips than a standard jelly roll if you piece diagonally (46 strips total).
Rather than cut six blocks, you can cut two off of your strip set for the middle row, then sew the remaining length into a 16-strip-wide strip set and cut that in half for rows 1 and 3—this is a little less exact, but will let you use up the full length rather than discarding the remaining few inches leftover after cutting blocks. Doing it that way likely accounts for the longer length of my quilt.
“Lollipop Baby Quilt”, Rachael Arnold, September 2011.
Good luck with your own quilt-making!
Caveat: I donated the quilt to the Linus Project a few months after finishing it in 2011, so I’m working partially from memory/partially by working out the math and logic again in 2014. The latter has some contradictions to the original post, such as the finished size. I claimed that the original quilt is ~36″ × 51″, but my current math concludes that it should be 32″ × 48″. My best explanation is that I must have (really) sloppily measured the unwashed, finished quilt and rounded up. I feel confident that the new measurements are correct (plus or minus an inch or two to account for piecing/cutting/shrinking deviations).